
In the course of owning a car, one of the most common issues you may encounter is a coolant leak. This might seem like a minor inconvenience at first glance, but if left unattended, it could lead to catastrophic engine damage. Why is this, you may ask? It’s simple: engine coolant, also known as antifreeze, is a crucial component of your car’s engine. It prevents the engine from overheating in summer and freezing in winter, thus ensuring optimal performance.
But what happens when coolant leaks onto your engine? It can cause numerous problems, from simple corrosion to a potential engine fire. Yes, you read that right—leaked coolant can lead to something as serious as an engine fire. Now you understand why we can’t ignore this issue.
In this comprehensive guide, we’ll delve deep into how to clean coolant off your engine. We’ll walk you through the step-by-step process, from identifying a coolant leak to safely and effectively cleaning it up. Our mission is to arm you with the knowledge to tackle this problem with confidence and precision. So, buckle up and let’s get started on this insightful journey into the world of auto maintenance. Remember, proper care and prompt attention to problems like these can significantly prolong the life of your beloved vehicle.
Understanding Coolant Leaks
What exactly is coolant, and why does its presence on your engine matter so much? Let’s delve deeper into these questions.
Engine coolant, or antifreeze as it’s also known, is a critical substance that ensures your car’s engine runs smoothly across varying temperatures. Its primary function is to absorb the excessive heat produced by the engine, preventing it from overheating during hot weather or strenuous driving conditions. At the same time, it stops the engine from freezing in colder climates, hence the name “antifreeze”.
A well-maintained coolant system is a hallmark of a healthy vehicle. But like any system, it’s not immune to potential problems. Coolant leaks are among the most common issues you might encounter.
So, what causes coolant to leak onto the engine? A variety of factors could be at play. These include:
- A damaged radiator: The radiator plays a key role in the coolant system. Its job is to dissipate the heat that the coolant absorbs from the engine. However, a cracked or damaged radiator can leak coolant.
- Worn-out hoses: The coolant system includes hoses that transport coolant to and from the engine. Over time, these hoses can deteriorate, leading to leaks.
- Faulty water pump: The water pump circulates the coolant through the engine and the radiator. A faulty or worn-out pump could leak coolant.
- Broken head gasket: The head gasket is a crucial component that seals the engine block and the cylinder head. If it breaks or fails, coolant could leak into the engine oil or onto the engine itself.
When coolant leaks and comes into contact with the engine, it can cause a variety of problems. These include corrosion, electrical issues (as coolant is often conductive), and even potential engine fires if the leak is near hot engine parts and is significant enough.
Understanding the origins and potential risks of coolant leaks underscores the importance of prompt and effective cleaning. Ignoring this issue could lead to more serious damage to your vehicle. Hence, learning how to clean coolant off your engine is a valuable skill for any car owner or aspiring DIY auto mechanic.
Signs of a Coolant Leak
Being able to identify a coolant leak promptly is a vital skill that every car owner should possess. It not only saves you from potential disaster, but also helps you maintain the health of your vehicle over the long haul. So, what are the telltale signs of a coolant leak, and how can you confirm that it is indeed coolant that has leaked onto your engine? Let’s dive into it.
First and foremost, visible coolant puddles under your vehicle are a pretty clear sign of a coolant leak. Coolant is usually bright green, orange, pink, or blue, and it often has a sweet smell. If you notice such puddles under your car, especially after it has been parked for a while, you might have a coolant leak.
Another common sign of a coolant leak is overheating. Remember, the primary role of coolant is to absorb heat from the engine and dissipate it through the radiator. If your coolant is leaking, your engine may overheat due to insufficient cooling. If you notice your temperature gauge running higher than usual or your car’s overheating warning light comes on, this could indicate a coolant leak.
You might also detect a coolant leak by the smell. Antifreeze has a distinctive, sweet odor that’s quite different from the smells of oil or gasoline. If you notice this smell while driving or after parking your car, there’s a good chance you’re dealing with a coolant leak.
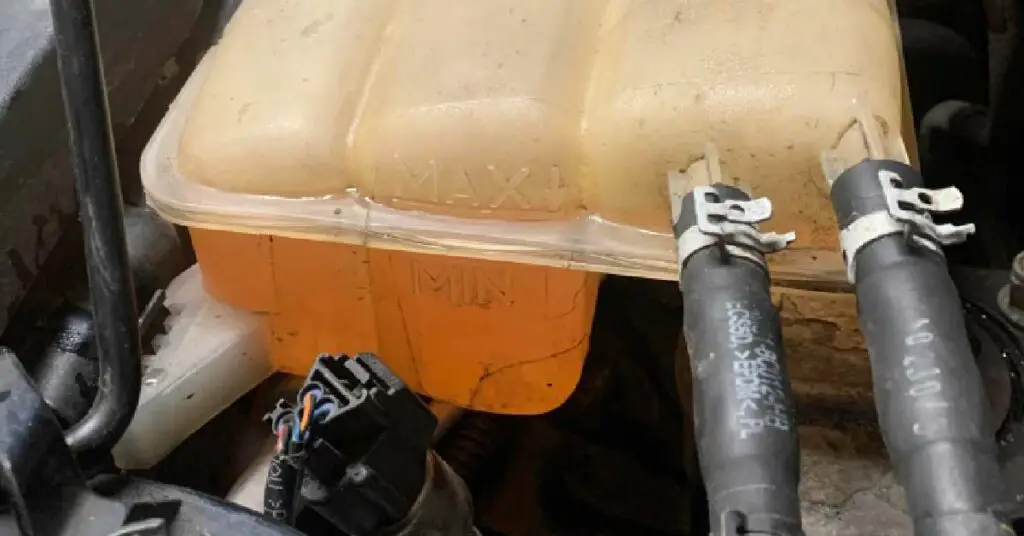
In addition to these signs, checking the coolant reservoir can provide a direct indication of a coolant leak. The reservoir, also known as the coolant overflow tank, holds excess coolant. If the level of coolant in the reservoir is frequently low, even after you’ve topped it up, this might suggest a leak in the system.
Lastly, spotting coolant on the engine or under the hood is a clear sign of a leak. However, due to the complexity of an engine’s design, the coolant may not always leak directly downwards. It could be diverted along various engine parts and end up pooling in a different location from the leak source.
Confirming a coolant leak and its source might require a bit of detective work. But, with these signs in mind, you’re well-equipped to identify and address coolant leaks before they can wreak havoc on your engine.
Materials Needed for Cleaning Coolant Off an Engine
Now that we’ve identified a coolant leak’s warning signs, it’s time to gather the necessary tools and materials for the cleaning process. Ensuring you have the right items on hand will not only make the task easier but also safer. Here’s what you’ll need:
- Protective gear: Safety should always be your top priority. You’ll need gloves to protect your hands from the coolant, and safety glasses to protect your eyes from any potential splashes. You might also consider wearing old clothes or a work apron to protect your clothing from stains.
- Absorbent materials: You’ll need these to soak up the leaked coolant. This could include rags, paper towels, or even specialized products like oil absorbent pads. Remember, coolant is harmful to both pets and the environment, so it’s important to clean up spills thoroughly.
- Cleaning solution: A mixture of dish soap and warm water usually works well to clean up coolant. You could also consider a commercially available engine degreaser for a more thorough clean.
- Spray bottle: A spray bottle will come in handy for applying your cleaning solution. It allows for a more targeted application and helps prevent excess runoff.
- Soft brush: This will help you scrub away the coolant residue without damaging your engine parts. A toothbrush or paintbrush could work for smaller, hard-to-reach areas.
- Container: You’ll need a container to catch any coolant residue that you rinse off. This will help prevent the coolant from contaminating the environment.
- Water: After applying and scrubbing with the cleaning solution, you’ll need water to rinse off the engine. Make sure it’s cool or lukewarm, as hot water could potentially damage engine parts.
- Compressed air (optional): If available, compressed air can be a great way to dry off your engine quickly after rinsing.
Collecting these materials beforehand will streamline your cleaning process and ensure you’re prepared to handle the task efficiently and effectively.
Step-by-Step Guide to Cleaning Coolant off Your Engine
Equipped with the right tools and a clearer understanding of coolant leaks, you’re now ready to tackle the task of cleaning your engine. This process requires attention to detail and patience, but rest assured, it’s a task you can accomplish with our step-by-step guide.
Step 1: Safety First: Preparing Your Vehicle and Yourself for the Cleaning Process
Your safety is paramount. Before you begin, put on your protective gear, including gloves and safety glasses. Ensure your vehicle is off and completely cooled down to avoid burns from hot engine components.
Step 2: Locating the Source of the Leak
Identifying where the coolant is coming from will help you understand the extent of the cleaning required. It also gives you an opportunity to address the root cause of the leak. Look for pooling coolant, and trace it back to its source, considering that the coolant might have traveled from the leak origin due to the engine’s layout.
Step 3: Removing the Coolant Residue
Using your absorbent materials, blot the coolant from the engine. Start from the top and work your way down, allowing gravity to help with the process. Avoid scrubbing at this stage, as you might unintentionally spread the coolant further.
Step 4: Cleaning the Engine
Mix your cleaning solution of warm water and dish soap in a spray bottle. Thoroughly spray the affected areas, taking care to cover all spots where coolant has leaked. Allow the solution to sit for a few minutes to break down the residue, but avoid letting it dry. Using your soft brush, gently scrub the engine, focusing on areas with stubborn coolant residue. If necessary, repeat the process until all visible coolant residue is gone.
Step 5: Checking and Confirming the Cleanliness
After scrubbing, rinse the engine thoroughly with your lukewarm water. Be sure to catch the runoff with your container to avoid environmental contamination. Look over the engine carefully to ensure all coolant has been cleaned off. If any residue remains, repeat the cleaning process.
Once the engine is thoroughly rinsed, dry it using your absorbent materials, or, if available, compressed air can speed up the process. It’s essential to ensure the engine is dry to prevent potential corrosion and electrical issues.
Having successfully cleaned the coolant off your engine, you’ve made a significant stride in maintaining the health and performance of your vehicle.
After-Cleaning Care and Preventing Future Coolant Leaks
Congratulations on successfully cleaning coolant off your engine! This is a significant achievement in maintaining your vehicle’s health. However, cleaning is just one part of the equation. You must take the necessary after-cleaning actions and learn how to prevent future leaks to truly master this aspect of auto care.
After-Cleaning Care:
- Check and Replace Coolant: Since a leak prompted the cleaning, it’s essential to check your coolant level and replenish it if necessary. Remember, an appropriate amount of coolant is vital for your engine’s proper functioning.
- Inspect for Damage: Inspect the areas where the leak originated for any damage. This could include cracks in your radiator, deteriorating hoses, or a faulty water pump. Repair or replace these components as required.
- Test Your Vehicle: Start your vehicle and let it reach its normal operating temperature while closely monitoring the engine for any signs of leakage. Remember to keep an eye on your temperature gauge to ensure your engine doesn’t overheat.
Preventing Future Coolant Leaks:
- Regularly Check Your Coolant Level: Familiarize yourself with your vehicle’s coolant reservoir and make it a habit to check the coolant level regularly. If you notice the level decreasing frequently, this might be a sign of a leak.
- Inspect Hoses and Radiator: Regularly inspect the hoses connected to your radiator for any signs of wear or damage. Check the radiator itself for any cracks or leaks.
- Routine Maintenance: Regular servicing of your vehicle can help catch potential issues before they turn into bigger problems. During a routine service, professionals can check the health of your coolant system and other vital parts of your vehicle.
- Be Observant: Pay attention to your vehicle’s performance and any unusual signs such as smells or leaks. Early detection of problems often results in simpler, less costly solutions.
Through regular maintenance and vigilance, you can prevent future coolant leaks, saving yourself from potential damage and cost. Remember, every car owner is also a steward, and taking care of your vehicle ensures its longevity and performance.
Conclusion: Taking Control of Your Vehicle’s Health
And there you have it—an in-depth, comprehensive guide on how to clean coolant off your engine. We’ve journeyed through understanding coolant leaks, identifying the signs, gathering the right materials, and tackling the cleaning process step by step. But it doesn’t stop there; we’ve also discussed the crucial steps to take after cleaning and how to prevent future coolant leaks.
Taking on the role of a DIY auto mechanic, even in small tasks like this, can seem daunting, but remember that every journey begins with a single step. By taking control of your vehicle’s health, you’re not only ensuring its longevity and performance, but you’re also saving yourself potential future repair costs. More importantly, you’re investing in a valuable skill set that is truly rewarding.
While this guide has covered the essentials of dealing with a coolant leak, remember that some issues may require professional help. If you ever feel uncomfortable or uncertain about any aspect of car maintenance, do not hesitate to reach out to a professional mechanic. After all, it’s always better to be safe than sorry.

As a seasoned mechanic and proud owner of three successful car workshops, I’ve dedicated my life to helping people just like you overcome their everyday automotive challenges. I created this website as a labor of love, with a simple mission: to make car maintenance and repairs more accessible and approachable for the “average joe.”